Deprecated: Creation of dynamic property Jupiterx_Conditions_Check::$singulars is deprecated in /var/www/html/insights/wp-content/plugins/jupiterx-core/includes/condition/classes/conditions.php on line 18

Deprecated: Creation of dynamic property Jupiterx_Conditions_Check::$archives is deprecated in /var/www/html/insights/wp-content/plugins/jupiterx-core/includes/condition/classes/conditions.php on line 19

Deprecated: Creation of dynamic property Jupiterx_Conditions_Check::$woocommerce is deprecated in /var/www/html/insights/wp-content/plugins/jupiterx-core/includes/condition/classes/conditions.php on line 20

Deprecated: Creation of dynamic property Jupiterx_Conditions_Check::$users is deprecated in /var/www/html/insights/wp-content/plugins/jupiterx-core/includes/condition/classes/conditions.php on line 21

Deprecated: Creation of dynamic property JupiterX_Core\Condition\Apply_Condition::$checker is deprecated in /var/www/html/insights/wp-content/plugins/jupiterx-core/includes/condition/classes/apply-condition.php on line 57

Deprecated: Creation of dynamic property JupiterX_Core\Condition\Apply_Condition::$meta_name is deprecated in /var/www/html/insights/wp-content/plugins/jupiterx-core/includes/condition/classes/apply-condition.php on line 58

Deprecated: Creation of dynamic property JupiterX_Core\Condition\Apply_Condition::$posts_option is deprecated in /var/www/html/insights/wp-content/plugins/jupiterx-core/includes/condition/classes/apply-condition.php on line 59

Deprecated: Creation of dynamic property JupiterX_Core\Condition\Apply_Condition::$id is deprecated in /var/www/html/insights/wp-content/plugins/jupiterx-core/includes/condition/classes/apply-condition.php on line 60

Deprecated: Creation of dynamic property JupiterX_Core\Condition\Apply_Condition::$required_widget is deprecated in /var/www/html/insights/wp-content/plugins/jupiterx-core/includes/condition/classes/apply-condition.php on line 61

Deprecated: Creation of dynamic property JupiterX_Core\Condition\Apply_Condition::$posts is deprecated in /var/www/html/insights/wp-content/plugins/jupiterx-core/includes/condition/classes/apply-condition.php on line 72

Deprecated: Creation of dynamic property JupiterX_Core\Condition\Apply_Condition::$query is deprecated in /var/www/html/insights/wp-content/plugins/jupiterx-core/includes/condition/classes/apply-condition.php on line 124
How to use your GPU as High-Speed Storage - TUX Insights Skip to content

How to use your GPU as a High-Speed Storage

Everything is changing so fast and so is technology, the recent launch of NVIDIA’s latest RTX 3000 series based on Ampere architecture brings in more VRAM so that people can do more insane things like what I’m gonna show you with this post. Let’s learn how you can install a game on your GPU’s VRAM.

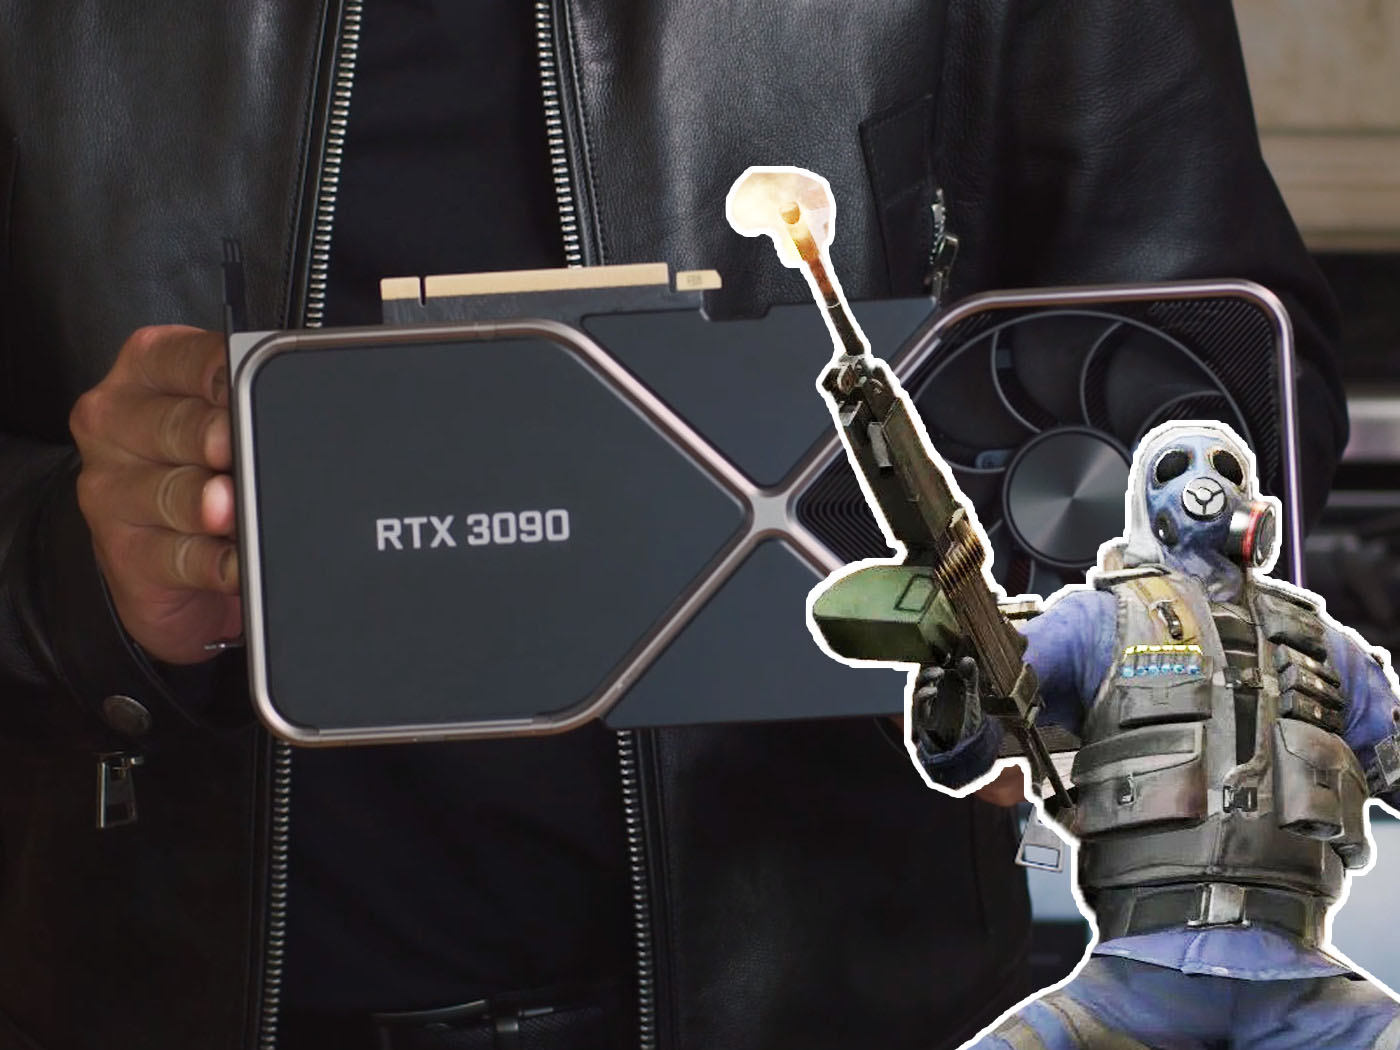
As insane as it sounds it has already happened! The increase in GPU VRAM has lead people to attempt such things as this woman who has installed Crysis 3 on her RTX 3090.

This is possible as the RTX 3090 has 24GB of GDDR6X memory. She then partitioned it into two sections, a 10GB and a 15GB variant, and installed the game. Even with Crysis 3 installed on the GPU’s VRAM the total memory usage wasn’t maxed out, it just touched 20GB, with the GPU load at 40%.

So if you are curious to know how you can do this, then it simple and can be done by downloading two softwares and a few clicks.

Install a Game on GPU's VRAM using GPU RAM Drive
GPU RAM Drive

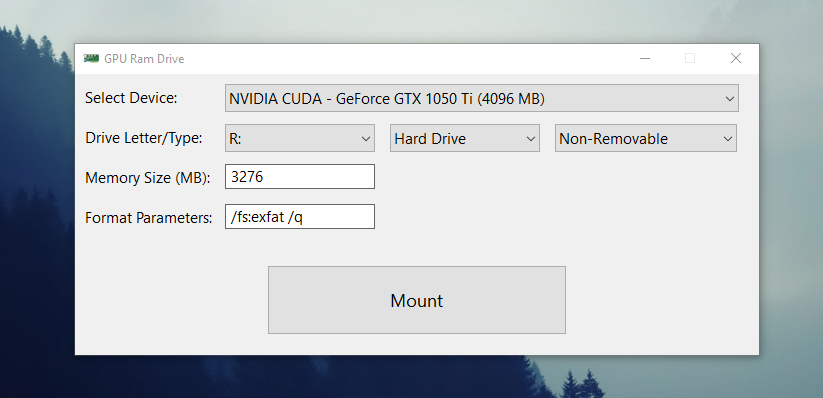
Steps to use GPU RAM DRIVE and mount VRAM as storage

  1. Download and Install ImDisk Virtual drive.
  2. Download GpuRamDrive.
  3. Open GpuRam Drive_x64.exe or GpuRamDrive_x86.exe depending on your operating system.
  4. Select the graphics card you want to use for installing the game.
  5. Choose the drive letter for assigning a drive letter to the virtual drive you are gonna create.
  6. Select the hard drive.
  7. Choose how the drive should be recognized as Removable or Non-Removable.
  8. Select the amount of memory you need to allot from GPU VRAM to the Virtual Drive.
  9. Leave the Format Parameters as such.
  10. Click Mount.

That’s all now open the File explorer, you will see a new drive there. Install whatever game or software into that drive and enjoy.

Share your thoughts!
Join our community and share your thoughts about this article with thousands of people like you. You can ask questions, give answers, and do more. Don't miss out on all perks you will have as a community member, join now.
Join the TUX Community!
Join our tech community and meet people like you. Post and discuss about computers, smartphones or any other gadgets. Feel free to sign up now, it only takes a few seconds!
Cookie Notice
By using our site you agree to our use of cookies to deliver a better site experience.

Notice: ob_end_flush(): Failed to send buffer of zlib output compression (1) in /var/www/html/insights/wp-includes/functions.php on line 5349

Notice: ob_end_flush(): Failed to send buffer of zlib output compression (1) in /var/www/html/insights/wp-includes/functions.php on line 5349