Fastest Ryzen Gaming PC Build Under Rs.65,000


Deprecated: ltrim(): Passing null to parameter #1 ($string) of type string is deprecated in /var/www/html/insights/wp-content/themes/jupiterx/lib/api/utilities/functions.php on line 152

Building a PC isn’t so difficult but for someone with zero experience, it will be tricky. But what’s more tricky is the choice of parts, there lots of computer hardware in the market for the same purpose. So for a starter, it will be confusing to choose the better option. Don’t worry, we have got you covered! This article will simply show you the best hardware choices to build the best and fastest gaming under Rs.65,000.

We have chosen the perfect PC hardware to help you build the fastest gaming pc under Rs.65,000. This guide will also give you a basic idea about the different hardware components and their purpose.

Introduction To Building the Fastest Gaming PC Under Rs.65,000

For this build, we will go for the AMD Ryzen series processor because AMD made a significant change in the CPU market which was previously dominated by Intel. Intel’s offerings are quite expensive when compared to AMD’s processors at the same price bracket. Rs.65,000 is a good amount of money that one would want to invest in a PC, but PC hardware can get expensive and if you don’t know to choose the right hardware then you can easily waste your budget unnecessarily.

But here I have made a list of components that I used to build a gaming PC for one of my friends. But to my surprise, this build turned out to amazing and provides great value for money. And in addition to that, you might not need to do any upgrades for 1 or 2 years (depending on your use case).

Parts List

To make your life easy, here is the list of the parts that we will be using to build the fastest Ryzen gaming PC under Rs.65,000 and their pricing. Please note that the pricing provided here are referenced from Amazon at the time of writing. This price may or may not vary, you can check other shopping sites or local stores for a better deal. If you are looking to buy these parts then you can find the shopping links here.

Ps. If you are lucky enough then you might even be able to acquire all the parts for under Rs.50,000.

Component NamePrice in Rupees
Ryzen 3 3300X₹13,999
Zotac Geforce GTX 1660 AMP Edition 6GB₹19,990
MSI B450M PRO-VDH MAX₹7,399
Corsair Vengeance LPX 8GB DDR4 3200MHZ (x2)₹3,400
Cooler Master MWE 450W₹3,149
Samsung 970 EVO Plus 250GB NVMe M.2 SSD₹ 3,999
Seagate BarraCuda 1TB HardDisk₹3,199
Ant Esports ICE-200TG₹2,790
Case Fans and ExtrasN/A (Read more)
Total Amount₹61,325
Price from Amazon.in

CPU: Ryzen 3 3300X

(Image credit: gamersnexus.net)

For this build, we will use the AMD Ryzen 3 3300X because this quad-core processor provides excellent value for money and showcases excellent performance. Initially, I thought to go for the Ryzen 5 3500X but even though it has 6 cores it doesn’t have enough threads to compliment the full potential of the cores. In addition to that, it’s single-core clock speeds are much lower than the 3300X’s. Which makes the Ryzen 3 3300X a much better gaming CPU and along with that you will be able to save Rs.1000-2000 over the 3500X (depends on the deal you get).

However, if you plan to upgrade later on or if you can spend more on the CPU then I will recommend you choose the Ryzen 5 3600 or higher models. And that’s because the Ryzen 5 series 3500 and 3500X CPUs are not international models (I’m nitpicking, it’s up to you).

Coming back to the topic, this CPU can reach up to a 4.3 GHz boost clock and if you can purchase a good cooler later on then you push the clock speeds even further. You can find general specifications and benchmarks below or skip to the next section.

CPU Specifications

AMD Ryzen 3 3300X Specifications
CPU Cores4
Threads8
Base Clock3.8 GHz
Max Boost Clock Up to 4.3 GHz
Default TDP / TDP65W
Total L3 Cache16 MB
Total L2 Cache2 MB
For full specifications visit AMD’s product page here.

Benchmarks

GPU: Zotac Geforce GTX 1660 AMP Edition 6GB

We will be pairing a GTX1660 in this Ryzen 3 3300X build because for under Rs.20,000 the GTX 1660 provides an excellent 1080p gaming experience and some low-end 4K gaming too. This CPU and GPU combo pairs really well to provide stable 60+ FPS on most modern at 1080p max settings. You can choose a GTX1660 from any brand depending on how you can flex your budget. However, this is a good card for this price range that has a boost clock of 1845 MHz and 6GB of VRAM which is good enough for most AAA titles.

Furthermore, there are 3 display output options, in this card you will get 3 Display Port 1.4s and 1 HMDI 2b port so that someday if you want you can rock a 4 monitor setup. You see more specifications of the card below or skip to the next section.

Note: Dedicated graphics card is required to get video output from this PC build because this Ryzen series and Ryzen 3 3300X doesn’t have onboard graphics.

GPU Specifications

Zotac Geforce GTX 1660 AMP Edition 6GB Specifications
CUDA cores1408
Video Memory6GB GDDR5
Memory Bus192-bit
Engine ClockBoost: 1845 MHz
Memory Clock8 Gbps
For more details and specifications visit product page here.

Motherboard: MSI B450M PRO-VDH MAX

The MSI B450M PRO-VDH MAX is the cheapest motherboard that I could find with 4 RAM slots and it also supports RAM clock speeds up to 3466+MHz. MSI is a well-known manufacturer of motherboards and other PC hardware so this motherboard is nothing but great for the price. This motherboard features AMD® B450 Chipset which will give us fair enough room for overclocking and supports Ryzen 5000 series CPUs as well. In addition to that, there is a steel-reinforced PCIe slot, USB 3.2 Gen1 support, and an M.2 SSD slot. There are lots of I/O ports that are 8 USB ports at the rear in which four of them are USB 3.2 Gen1 ports. You can find all the details and specifications here.

RAM: Corsair Vengeance LPX 8GB DDR4 3200MHZ (x2)

The Corsair Vengeance LPX is so popular in the PC enthusiast community and Corsair being such a reputable brand name in the RAM market, the Corsair Vengeance LPX 8GB DDR4 ram is an easy choice. This or Kingston HyperX Fury 8GB 3200MHz DDR4 model is undoubtedly the fasted one you can get for this price range, both are 3200Mhz ram sticks which are fast and Ryzen CPUs love fast RAMs. For this build, we will need two 8GB ram sticks so that you will have a total of 16GB of system memory. You can buy Corsair or HyperX depending on the price. The only thing to consider when you buy is to buy a DDR4 ram with at least 3200Mhz clock speed or you can easily find links to all the components used in this build at the end of this article.

Storage: SSD + HDD

In this build we will using a 250 GB NVMe Solid State Drive and a 1TB Hard Disk. The 250GB NVMe SSD will be used to install Windows and one two games that you mainly play so those will load much faster compared to hard disk or even normal SSD. NVMe SSDs are far more faster that normal SSDs and the fact that they are much cheaper now makes it a great high speed storage option.

And the 1TB hard disk will hold your movies, other games and files that you wont access frequently. Depending on how much you can flex you budget feel free to choose higher capacity ones.

Samsung 970 EVO Plus 250GB NVMe M.2 SSD

While there are other brands in the market I prefer Samsung 970 EVO Plus as they have proved to be fast and reliable to me. This is one of the single most products that will the gaming pc faster than other build guides. Using an NVMe SSD over conventional will make your Rs.65,000 gaming PC much faster.

Seagate BarraCuda 1TB HardDisk

Seagate’s BarraCuda 1TB HardDisk is the most popular hard disk option in the market, it will last longer.

PSU: Cooler Master MWE 450W

All the components above will max out the under 300W so this Cooler Master 450W power supply will provide plenty of juice for your build. The Cooler Master MWE 450W is an 80 Plus certified PSU that’s silent and efficient. Never buy a low-quality PSU for saving money, the last thing you want to happen is to connect your newly build PC to the power outlet and get the motherboard fried due to a short circuit. A good PSU can save your expensive PC hardware from such incidents and also from lighting spikes and surges.

Case: Ant Esports ICE-200TG

For the price the Ant Esports ICE-200TG offer fair enough build quality and features. Not to mention the RGB lights on the front panel screams gaming aesthetics. The PSU shroud is a nifty little feature that will help you save a lot of time hiding the cables of your power supply. Also there are three USB ports at the front with one being a USB 3.0 port.

Extras & Miscellaneous

Case Fans

I have seen many build guides on the web without talking about case fans or extras that you will need to build and maintain a PC. But ill share those with you, I haven’t included the price of these because the case fan market in India is kinda messed up. There are normal fans that just spins and there is no control, there are PWM fans that you can control using the software so that you can perfectly control your PC’s airflow. and then there are RGB fans and RGB PWM Fans. You can just choose the cheapest fan and call it a day if you don’t care about airflow or aesthetics. However, if you do care then getting an RGB is just plain better.

Thermal Paste

Even though the stock cooler that you got with the CPU comes pre-applied with thermal paste, later on, you may need to clean your PC and want to remove the cooler. In such a situation having a thermal paste on hand will get good. Also, the pre-applied thermal paste doesn’t offer much heat conductivity compared to aftermarket solutions.

Cable Ties

Cable ties are so helpful in making your cable management work look clean. Having some around is always a good idea.

FAQs

  1. Can you edit video on a Rs.65,000 PC?

    Yes, you pretty easily edit 1080p videos and even 4K videos if you can reduce the preview resolution. Video editing software needs more RAM, a PC with 16GB of RAM is a good start for video editing. However, you will need to add more RAM for better results.You can buy two more 8GB RAM sticks and max the total RAM to 32GB which is recommended for software like Adobe Premiere Pro.

  2. Can you play games at 4K on a Rs.65,000 PC?

    Yes, every game will run at 4K resolution, the GTX1660 super is great for the price but its better suited for 1080p gaming. To get somewhat playable experience on a 4K monitor then you will have reduce the game’s graphics settings.

Buy CPU: Ryzen 3 3300X from Amazon | MD Computers.

Buy GPU: Zotac Geforce GTX 1660 AMP Edition 6GB from Amazon OR Zotac GTX 1660 Twin Fan 6GB from MD Computers.

Buy Motherboard: MSI B450M PRO-VDH MAX from Amazon | MD Computers.

Buy RAM: Corsair Vengeance LPX 8GB DDR4 3200MHZ from Amazon | MD Computers OR HyperX Fury 8GB 3200MHz DDR4 from Amazon | MD Computers

Buy Hard Disk: Seagate BarraCuda 1TB HardDisk from Amazon.

Buy SSD: Samsung 970 EVO Plus 250GB NVMe M.2 SSD from Amazon.

Buy Case Fans: ARGB Fans Amazon | MD Computers OR buy Auto RGB Fans Amazon.

Buy Thermal Paste: Corsair TM30 Performance.

How to use your GPU as a High-Speed Storage

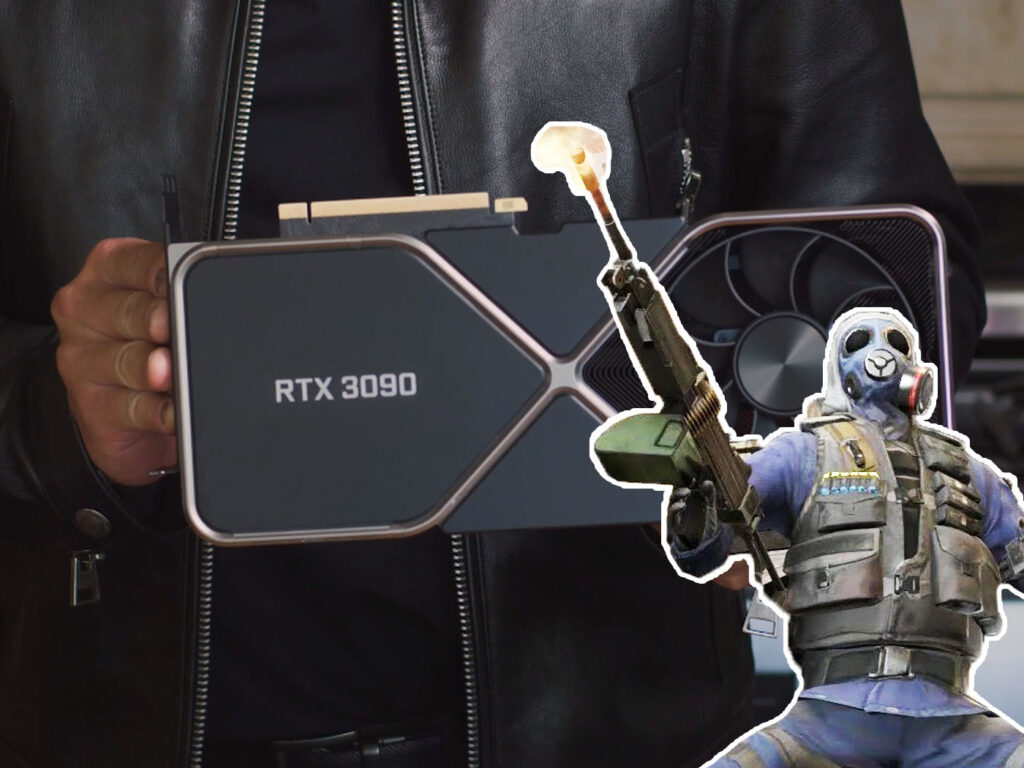
Everything is changing so fast and so is technology, the recent launch of NVIDIA’s latest RTX 3000 series based on Ampere architecture brings in more VRAM so that people can do more insane things like what I’m gonna show you with this post. Let’s learn how you can install a game on your GPU’s VRAM.

As insane as it sounds it has already happened! The increase in GPU VRAM has lead people to attempt such things as this woman who has installed Crysis 3 on her RTX 3090.

This is possible as the RTX 3090 has 24GB of GDDR6X memory. She then partitioned it into two sections, a 10GB and a 15GB variant, and installed the game. Even with Crysis 3 installed on the GPU’s VRAM the total memory usage wasn’t maxed out, it just touched 20GB, with the GPU load at 40%.

So if you are curious to know how you can do this, then it simple and can be done by downloading two softwares and a few clicks.

Install a Game on GPU's VRAM using GPU RAM Drive
GPU RAM Drive

Steps to use GPU RAM DRIVE and mount VRAM as storage

  1. Download and Install ImDisk Virtual drive.
  2. Download GpuRamDrive.
  3. Open GpuRam Drive_x64.exe or GpuRamDrive_x86.exe depending on your operating system.
  4. Select the graphics card you want to use for installing the game.
  5. Choose the drive letter for assigning a drive letter to the virtual drive you are gonna create.
  6. Select the hard drive.
  7. Choose how the drive should be recognized as Removable or Non-Removable.
  8. Select the amount of memory you need to allot from GPU VRAM to the Virtual Drive.
  9. Leave the Format Parameters as such.
  10. Click Mount.

That’s all now open the File explorer, you will see a new drive there. Install whatever game or software into that drive and enjoy.

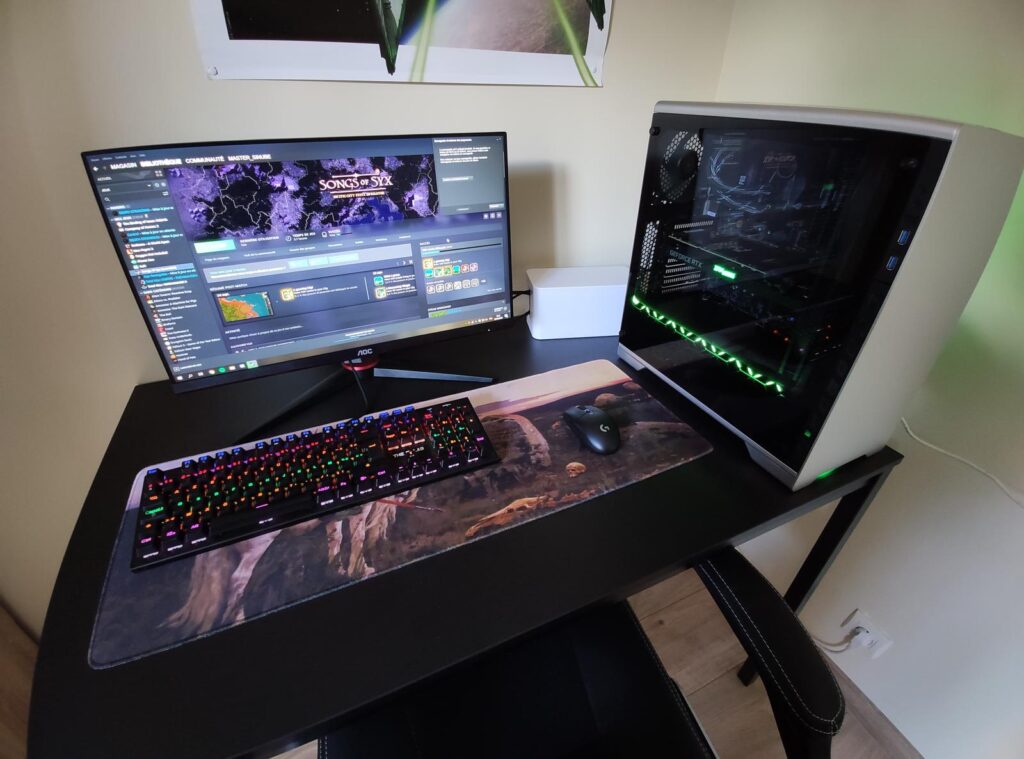
This is how you should set up your desk for work

The perfect desk set up and like a greatly designed cockpit. Your computer desk setup is key to better productivity or gaming, we spend a lot of continuous hours in front of our computer. If your desk setup is not ergonomically perfect then you will feel tired, experience pain instantly or in the future.

Yeah, you can buy a good comfy chair and a great desk of your liking but the thing is that the chair and desk you just bought or the ones you have are made for everybody. Spending eight hours a day reaching slouching or craning can lead to pain.

Ergonomic Computer Desk Setup

What makes a Perfect Desk Setup

In this article ill show you how you organize your desk for the best ergonomic desk setup for spending hours of productive time with your computer. Before reading the steps keep in mind that the key to a perfect desk setup for work is that you should be able to do your work without having to lean or move to take or reach anything on the desk, so place everything accordingly.

If you are working from then you might want to see the list of best webcams that you can buy for your work.

Steps For The Perfect Desk Setup at Work

1. Adjust your Chair Height

Ergonomic Computer Desk Setup: Chair Height

To achieve the perfect desk set up, start by adjusting the chair height. The average desk height is 29 to 30 inches tall, for some this height is fine but for many people, this could be too tall or too short. That’s where your chair comes in. The first thing I want to do is adjust
the height when you do make sure your elbows are bent to ninety degrees. Your arms and hands should be parallel to the floor.

2. Feet Flat on The Floor

Ergonomic Computer Desk Setup: Flat foot on the floor

So you have adjusted your chair height and now see if your feet are perfectly flat on the floor? If they are not touching flat on the floor this could become an issue and is not good for an ergonomic desk setup. Find yourself a good comfy footstool or anything like a using ream of paper so that you can comfortably sit with your foot flat on the floor.

3. Monitor Placement

How to place a computer monitor. Ergonomic Computer Desk Setup: Monitor Position
Image credits to Viewsonic

To position your monitor perfectly for ergonomics, the monitor should be close enough about arm’s length so you’re able to read without having to strain your eyes or to bend forward and adjust your posture. You should always place your monitor such that the top bezel oof your monitor should be at your eye level.

If your monitor stand does not allow height adjustment then use reams of paper or just buy a monitor stand that can be fixed on your table and attach you monitor to that using the VESA mount. Much better. If you dual monitor setup then consider how you use them. If you have a primary monitor you want that directly in front of you. If you use both monitors equally you want them lined up so you are in the middle of the two For a laptop. You want to use a kickstand to raise the screen up to the proper height. Also, try to keep your whole setup perpendicular to windows so that you can avoid eye strain from glares.

4. Keyboard and Mouse Placement

Where your hands end up is where your keyboard should be, your mouse should end up right next to your keyboard. You want to move from your elbow instead of your shoulder to prevent overuse or strain or pain. Your keyboard should close to your body so that your elbow is comfortably by your side.

Ergonomic Keyboard Position. Ergonomic Computer Desk Setup
Image credits to NoMorePainErgonomics

Your keyboard placement should be low enough so that you can type with your arms parallel to the floor.

Try to use a keyboard that has wrist rest, many keyobards are not ergonomically designed. They are made in such a way that your wrist will on the desk that is too low. This might be a problem for some.

As a solution for this you can buy a keyboard that has a wrist rest with it like the one shown in the image below or you can simply substitute that by using a book you can buy separate wrist rest.

Ergonomic Keyboard example. Ergonomic Computer Desk Setup
Image credits to Corsair

And about your mouse, make sure it’s comfortable for your hands. Make sure it’s not too big or too small, or it will cause your wrist bending in awkward positions. The Techradar has an article on good mouse recommendations for different needs, and there are also ergonomic mice and alternative input tools that could be more comfortable for you than traditional mice.

5. Keep your Desk Clutter Free

Keep solely the items you use daily

This might be a pen and a notebook, your phone charging stand, your bottle or cup, and a microfiber cloth for improving your phone screen and monitor.
Store everything else off of your table.

Going Minimalist can help in achieving a good desk setup

Personal photos and other decorative items may interrupt your productivity. Attempt limiting personal decorations to merely three things or less–and moving any others to outside your direct line of sight. Check that everything you place on your table is either helpful, necessary, or brings you a positive feel. Clearing out anything that doesn’t have a reason to be there.

Hide Less Vital Supplies Strategically

Still, there will be many things that you will need often to do your work. Hide these things behind your monitor or under the desk so that you can reduce the visible clutter but still access them easily. Hide power strips and wires from sight, use double-sided tape, and stick them under or behind the desk.

Manage cable clutter with zip ties or velcro. You can find lots of low-cost tools to keep your table clean.

Exercises to Reduce Pain

Move after every 10 to 15 minutes and when you start to slouch in your chairs do some exercise. Here is a good video by Mayo Clinic, it will teach you some exercises that you can easily do while sitting.

Conclusion

Your desk setup greatly affects your productivity, keep it neat and simple. You need a healthy mind and body to keep everything going. Follow these tips and implement them accordingly. I hope this article helps you to achieve the desk setup and maximize your productivity.